Since version 3, Lightroom has offered a number of profiles to emulate different in-camera picture styles, but they’ve been hidden away in the Camera Calibration panel so most people didn’t know they existed. In the April 2018 Lightroom releases, these profiles have become first-class citizens, moving to the top of the Develop panels, and many more profiles have been added.
Profiles are designed to be selected first, before you start editing, just like choosing a specific film stock for it’s unique “look”. You can select a different profile at any time, and your slider values will remain untouched, but the look of the photo may change considerably, so it’s more efficient to select your profile before you start editing.
Victoria Bampton
I heard I don’t know how many photographers complaining about the ‘flat’ colors in Lightroom, using this as pretext to switch to other editing software and promote their supposedly better color rendition. It always baffled me that none of them bothered to do a little research into color profiles, a feature in Lightroom that does exactly this. I meant to write a blog post on this subject for months, but other things always got in the way – I guess this is the best time for it.
Previously these settings were a little buried in the last panel in the develop module (Camera Calibration); I guess many people don’t bother scrolling that far. The default Adobe profile is indeed particularly flat; immediately after discovering this feature I switched to camera-specific profiles. Canon generally has vivid colors and good reproduction, and their profiles reflect that. I created a couple of user presets (standard, landscape and portrait), each linked with the corresponding color profile and with different sharpening settings, and apply them in bulk after import depending on the type of photo. This is the quickest way to work with color profiles and has the added advantage of applying the correct profile before doing more specific editing. This update doesn’t change my workflow, since it already integrated color profiles, but the more prominent location should help photographers discover them sooner and use them more frequently.
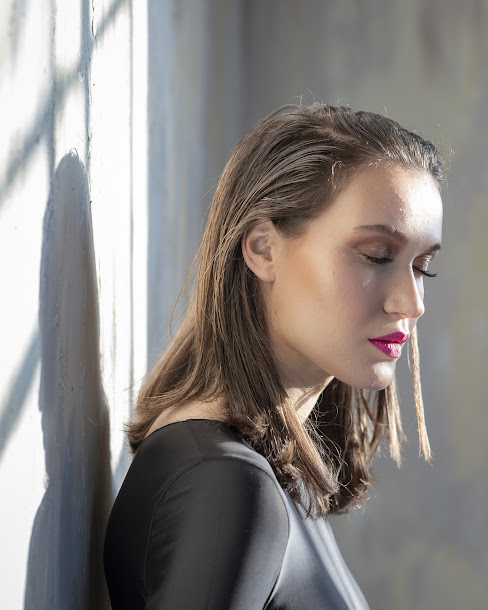
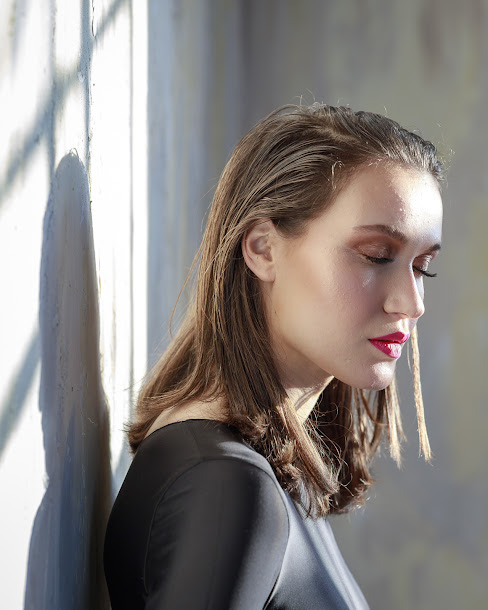
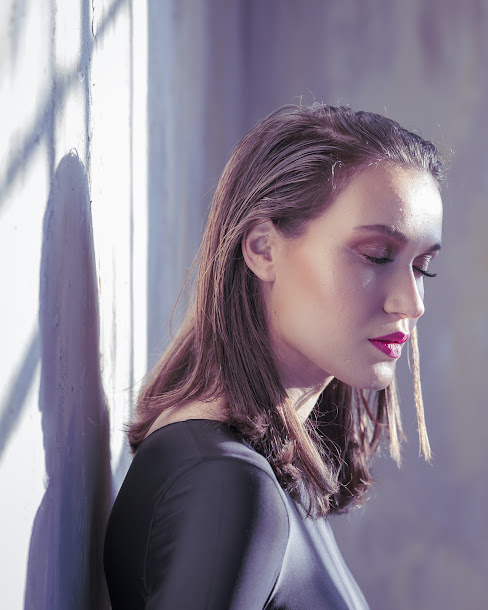
I spent a little time with the new Adobe profiles recently added, but they still seem flat and muted compared to the manufacturer profiles. Adobe Portrait even looks identical at first glance to the default Adobe Color. You can see the effect in the examples below (other adjustment sliders are identical). I’m actually more excited about the artistic profiles introduced now. This seems a cool and easy way to achieve very distinctive and dramatic looks that would otherwise require massive editing, probably even a trip to Photoshop, or more complicated light setups during the photo shoot.

Post a Comment